Producing a professional-looking book is critical, especially when self-publishing.
Despite being more common than ever, self-publishing still carries the old stigmas: unwanted by ‘real’ publishers, unedited and unlikely to be any good. A product that’s obviously self-published, or amateurish, will raise questions of quality and may potentially discourage readers.
In order to rise above these tired perceptions, you must meet the same high standards held by publishing houses. In a marketplace swamped with self-publishing, your book must be on par with – or better than – those released by traditional publishers.
Table Of Contents
Read on for five ways you can create a professional-looking book.
1. Hire a professional cover designer
Despite even the best intentions, the truth is everyone judges a book by its cover. Your cover must stand out for all the right reasons. And how can you ensure your cover is the best it can be?
Hire a professional.
Now, not to discredit those authors with a far-reaching creative side, but unless you’re a technically trained graphic artist, designer or illustrator by trade, let someone else do it.
A good cover should catch the eye of a reader and tell them in a glance the genre, the tone and style of the narrative, and the intended market for the book. A great cover is a beacon that snags passing readers and draws them in to investigate further.
A bad cover can be fatal. And before you begin to defend your Photoshop skills and those sketches in the margins of your notebook, click here to see how wrong this can go.
Still not sure? Don’t forget, your cover isn’t just competing with other self-published works, but with publishing houses as well. Publishing houses with teams of designers, artists and illustrators, whose entire professions are dedicated to creating covers that will sell books.
If money is holding you back, relax. You have options.
By ‘hiring a professional’ we simply mean purchasing a product created by an industry professional. This product can be custom-designed or pre-made. There is an affordable option for every author, and every budget.
For more cover advice, check out these 7 essential tips to ensure your book cover is a winner.

Pre-made covers
A number of self-publishing platforms provide authors with the option of purchasing pre-made covers. These can cost anywhere from $10 to more than $200 depending on the format (ebook and/or print), complexity, quality of the image and the designer.
On the cheaper end of the scale, the covers can be bland and lack substance and style, but if you pay a little more you can get a cover worth the coin. That being said, some of the more expensive versions can still teeter on the generic (such as Young Adult Romances all featuring a similar long-haired girl staring forlornly towards assorted horizons).
One website worth exploring is The Book Cover Designer. There are thousands of pre-made covers available from a range of designers to suit the majority of mainstream genres. And some of them are pretty good.
Before you head to the checkout, though, find out exactly what you’re getting for your $75.
Is it a wraparound cover, including the spine and back? Or is it the front cover alone? If you are looking to stay digital, then a single high-resolution image will suffice, but if you’re aiming for print as well, you’ll need a wraparound cover that includes the spine.
Also, find out what happens to the image after you purchase it. Is it removed from the ‘shop’ so no other indie author can use it? Or does it remain available for purchase indefinitely?
When it comes to pre-made products, multiples are always a possibility. Usually the website will promote their promise of your cover being just yours, but if the seller won’t guarantee the individuality of your cover, then you need to ask yourself if sharing an image bothers you. If it does, then perhaps pre-made isn’t for you.
Custom design covers
If pre-made doesn’t work for you, freelance designers have got you covered.
While a custom design will always cost more than pre-made, commissioning a freelance designer can still be an affordable choice. A freelance designer makes for great member of your self-publishing team. And you don’t need to trawl Google until your head hurts to find one. There are websites that do it for you.
99 Designs is one such website. This platform turns your commission into a competition. You simply purchase a package (prices start from $399), submit your cover requirements and brace yourself for a torrent of ideas, examples and samples, sometimes in the hundreds, for up to a week following.
You can shortlist your favourites, suggest revisions, at the end of the week select the ‘winner’, and voila: you have a custom, professionally designed cover for your book.
Certainly, some might experience a moral dilemma pitting artists against one another for a few hundred dollars, but when it comes to value and turnaround time, 99 Designs is a hard-to-beat option. And if you did want to follow-up with your designer, or any designer, 99 Designs allows you to connect with the artists privately, enabling direct commissions.

Another great platform is Reedsy. Where 99 Designs is open to designers of varying ability, Reedsy designers are ‘vetted’, ensuring you are only connected with credible, quality creators (as well as editors, marketers, publicists and ghostwriters).
Scroll through the designers, inspect their folios and find one that’s right for you. Request a quote and go from there.
And if this isn’t enough, there are hundreds (more likely thousands) of designers you can find through a simple Google search. Most have comprehensive websites with folios on display.
But before you enlist the services of a designer, freelance or via a platform, always do the following…
Examine their previous projects.
If their folio isn’t on display, ask to see past work. Images are to designers what a publication list is to a writer. It’s proof of style, skill and credibility. Beware any designer who refuses this request.
Make sure the designer suits your book.
Is their style in sync with your own tastes/content/market? Just because they nail sexy thriller covers doesn’t mean they’ll be any good for middle-grade fairy tales.
Know what you want before you request a quote.
Knowing what exactly you need/want (such as style preferences and what format is required) will make negotiations, and later on, revisions, easier.
Clarify what your money gets you.
Will you get everything you need (such as ebook and print covers, promotional material, etc.) for the one price, or will this be an add-on once the commission is undertaken? Can they even supply you with everything you need or will you need to outsource other elements?
How many revisions are included in the original quote? How many images will you be provided with in the end, what size/resolution will they be, and how will they be delivered? Are those images your property or will they be resold later on?
Clarify anticipated turnaround time.
Quicker is not always better if the work is sloppy and extra revisions are needed. That being said, if a designer takes too long, questions of priorities and time management should be raised.
Hiring the right designer, or purchasing the right pre-made cover, is crucial. Your cover is your opening line and it needs to pack a punch.
For more resources, designers and insights, click here.

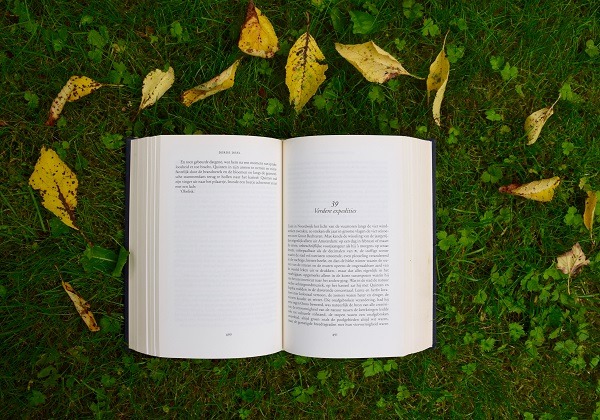
2. Pay careful attention to formatting
The formats you choose will have an enormous impact on your final product. In order to surpass your competitors, you must ensure your formatting is correct, consistent and high-quality.
Simplicity is key. While fancy lettering may look great on the title page, using it as your body font throughout the book will probably induce a migraine or two. Don’t distract your readers with your typography or poor spacing and minimal margins.
Here are the main things to consider when it comes to formatting.
Margins
Margins may seem a small detail, but in the world of book publishing, it’s the small details that count.
Leaving insufficient space along the edges of the page not only affects readability, but the layout of the entire book. A little extra in the margin allows for trimming errors at the printer. Not enough means awkward reading, loss of text, and a cramped, unprofessional appearance.
Take your margins seriously.
There are two types of margins you need to be aware of:
- Exterior (the top, bottom and outer edges of the page).
- Interior (the inner margin, where the book is bound, otherwise known as the ‘gutter’).
The size of these margins varies. The gutter should be at least 0.64 centimetres deeper than the outer edge, and the outer edge should always be at least 1.27 centimetres (though 1.90 centimetres is ideal).

The exact depth of the bottom and top edges depends on other formatting choices, such as:
Are you using running heads or running feet?
Running heads and feet are industry terms for the information displayed in the header and/or footer which orient the reader. Usually this information is the chapter title and author name, or book title and chapter title, or book title and author name.
They’re not compulsory, but they can add to the sense of professionalism of a book. For more information on running heads and feet, click here.
Where are you placing your folios?
Folio is the industry term for page number. You need to decide on the location of your folios before you can decide on your margin sizes.
For example, are they best in the bottom centre or top corner? This will, of course, have an impact on whether you choose to use running heads or feet as well.
As an example, on a page size of 15.24cm x 22.86cm (AKA 6″ x 9″) with a running head and folios at the bottom centre, the bottom margin could be 1.27cm, the top 1.90cm, the outer side 1.90cm and the gutter 2.54cm.
It’s important you experiment with these measurements. Find one that looks and feels right. A professional appearance is vital, but you need to be satisfied as well. After all, it is your book.
Alternatively, a lot of the self-publishing platforms provide their own recommendations for margins and layouts. Pay attention, read their suggestions and see if it works for you.
If still uncertain, inspect published works in your genre. This is a great way to get an idea of the architecture your target market expects.

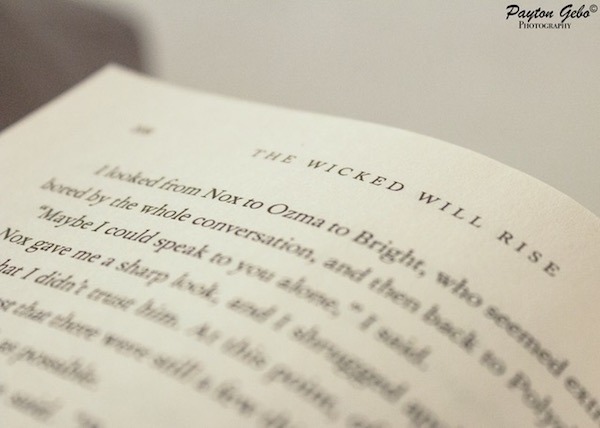
Typography
When confronted with the freedom of self-publishing, it can be hard to deny the urge to select a font that reflects the romance of your narrative, or the frazzled mental state of your protagonist, or the archaic war your characters struggle to survive.
But don’t. Just don’t. There are times your creativity should be unleashed, and selecting your font is not one of those times.
Choosing the wrong font for your book could be as bad as tossing the end product under the grill. A reader won’t get far if your lettering gives them a headache.
Simplicity is best in this area. Clear, crisp and easy to read. Select a font that won’t distract the reader from your words, because that’s what counts here. Your words are what got this whole show started. Do them justice and frame them well.
Serif is generally considered the better choice for long-term reading. Some good choices include Baskerville, Caslon, Minion Pro or Garamond. Size 10-12 is ideal for ease of reading, and you should avoid going larger than this unless your book is targeted at young children.
If the number of pages is becoming a budget issue, then play with styles (keeping in mind the above sensibility). You will be surprised the difference letter spacing and structure can make to the final page count.
Ultimately, your goal is to entertain your reader with your story, not your font.
Spacing and indents
Double spacing after a full stop is a definitive and loud ‘no’ when self-publishing. As is using the Tab key for each new paragraph.
A fiction work should have only a small indent at the start of each new paragraph, whereas a non-fiction should have block paragraphs and a blank row between them. A memoir falls under the fiction guidelines, as does historical fiction.
You can create an indent preset in Microsoft Word easily enough, and to correct a manuscript full of hard indents you can use the Find and Replace tool to save time (and sanity).
If you can’t figure out what indent size is right for you, refer to the shelves of your local library. Different genres have different styles; inspect your competitors and compare.
Chapter titles and subheadings
Chapter titles should begin one third to halfway down a page, and can be more creative in the font, though you still need to be legible and suit the content of your book. Subheadings should remain subdued but contrast in font (i.e. Times New Roman over Arial, or vice versa).
Both should be bigger than the body text but not excessively so. For example, the body is size 12, therefore the subheading is size 14 and the title 16 (this again is at your discretion).
A chapter can start on the left or right page; however, a lot of books stick to the right. Ultimately, printing either side will save you money, so this decision is entirely up to you.
Paper choice
Something as simple as your paper choice can have a massive impact on a first impression.
You will usually have the choice of at least two papers to print on: white and cream. White is preferred for non-fiction, while the industry standard for fiction is cream. Be wary: some self-publishing platforms don’t provide cream as an option, and those that do can vary greatly in their version of ‘cream’.
Consider your samples carefully: this detail counts. Choosing the right paper will ensure your product presents professionally, initially and long after purchase.
Spines
Often the spine is included as part of your cover purchase, though not always. Even if this is the case, don’t be blasé. A professional spine is nearly as critical as your cover – perhaps even more so.
A spine is the only way a reader can identify a book when shelved, and that’s most likely how your book will be displayed in a library or store. Your spine must be refined and alluring.
For a spine that stands out on the shelf, make sure you do the following…
Use a bold font.
Avoid curling, flowing, sweeping styles. Clear, strong text is the best way to grab the eye of a passing reader. You need to convey the title and the tone of the novel in a single glance. Make that font count.
Use colour.
Incorporate colour into your spine, whether as part of the overarching cover design or as a rogue dash of vibrancy against a pale background. Your spine needs to jump off the shelves at anyone walking by.
Add some interest.
Weave some graphics into the spine design that match the cover and your content. Tease the reader with intriguing images, or draw their gaze with an artful swirl of metallics. Whatever you do, it needs to be potent enough to be picked up.

Trim size
Trim size refers to when a book is trimmed in the final stages of printing.
Trim size is inclusive of shape as well as size. Most books are rectangular; however, square books are common for art and photography, while circles or hexagons are not unheard of in children’s picture books.
When choosing your trim size you must consider the intended market for your book. It may be better to choose a more common trim size (such as the trade paperback), which aligns with industry standards and supports a polished and professional appearance, rather than a more unique approach.
A romance novel aimed at 30-55-year-olds trimmed into the shape of a love heart might not be the best choice. If the readership was under the age of 10, however, you could be onto something.
After deciding whether you want paperback (softcover) or hardcover, or both, you’ll generally have the following options:
Mass market paperbacks
This is the most common size for fiction: 10.79cm x 17.78cm (4.25″ x 7″). If you buy a novel from an airport or grocery store, it will probably be this size.
Mass market sizing is usually reserved for commercially produced books, so may not be available to you.
Trade paperbacks
These are higher quality and closer to the size of a hardcover. Self-published books tend to be this size, both fiction and non-fiction, but you are by no means restricted to this (that is the freedom of self-publishing).
Trim sizes range from 12.7cm x 20.32cm (5″ x 8″) to 15.24cm x 22.86cm (6″ x 9″).
Children’s books, textbooks, manuals and workbooks
These tend to be larger and can be anywhere from 17.78cm x 25.4cm (7″ x 10″) to 21.59cm x 27.94cm (8.5″ x 11″). These books can be spiral-bound and the size is well-suited to books with a lot of images or drawings.
Photography and art books
These are free-range and don’t usually conform to any expectations. It depends entirely on the author/artist and what effect they are trying to achieve.

3. Perfect your blurb
The blurb: a handful of words as critical to the success of your book as your opening scene.
The blurb, or dust-cover copy (depending on who you speak to), is where you grab hold of the reader’s imagination and convince them they need to read more.
A jumble of words tossed together at the last minute isn’t going to cut it. Your blurb must be sharp, snappy, engaging. It needs to pack a punch in 100-250 words, fewer being better.
You need drama and intrigue, without sacrificing voice. You need to introduce the main players (your protagonist and antagonist at least) and the central plot points without giving away the ending. You need to convey mood, setting and pace, all in a pocket-sized portion of text.
In case you haven’t gathered so far, the blurb is also one of the hardest pieces of writing in your book. But it can be conquered.

There is a formula that authors and publishers often (but not always) employ when tackling the blurb. The structure of the blurb is broken down into four simple sections:
1. Situation
Open your blurb with a brief explanation of where your story begins. Name your protagonist and introduce their situation. This is also where you should introduce your setting, especially if it’s historical, science fiction or fantasy fiction.
2. Problem
Introduce the problem, or the change that challenges your characters. What is the event, issue or person that drives your narrative forward and forces your protagonist/s out of their comfort zone?
3. Possibility
Every story needs a twist, or a chance for the character/s to overcome their challenges (even if they ultimately fail). This is the reason the reader will want to read on to the end. Raise the question of hope.
4. Mood
Clarify the mood of your book. What is the tone and emotional context of the story? Is it an ‘erotically-charged thriller’ or an ‘enchanting, heart-warming family tale’?

Each section should be no more than a few sentences, and the entire word count should be no more than 250, though as mentioned above, the shorter the better.
An example of this formula in action can be seen in the blurb for His Bloody Project by Graeme Macrae Burnet, a book shortlisted for the 2016 Booker Prize.
Situation: The year is 1869. After a brutal triple murder in a remote community in the Scottish Highlands, a young man by the name of Roderick Macrae is arrested for the crime.
Problem: A memoir written by the accused makes it clear that he is guilty, but the police and the courts must decide what drove him to murder the local village constable. And why did he kill his other two victims?
Possibility: Was he insane? Or was this the act of a man in possession of his senses? Only the persuasive powers of his advocate stand between the killer and the gallows at Inverness.
Mood: In this compelling and original novel, using the words of the accused, personal testimony, transcripts from the trial and newspaper reports, Graeme Macrae Burnet tells a moving story about the provisional nature of the truth, even when the facts are plain.
His Bloody Project is a mesmerising literary thriller set in an unforgiving landscape where the rules can change but justice is absolute.

Not every blurb needs to follow this formula. Indeed, many don’t. Some authors choose instead to use direct quotes from the book itself, ones which offer a taste of all four sections in a snapshot of dialogue or imagery.
For example, the blurb for Joan Didion’s The Year of Magical Thinking is a quote extracted from a pivotal scene in the narrative:
Life changes fast. Life changes in the instant. You sit down to dinner and life as you know it ends.
This blurb, though short, immediately captures the curiosity of the reader, hints at mood, voice and content, and raises questions regarding the possible problems faced by the character/s. All of this in three sentences. And because of this brevity, the impact of the blurb is intensified, making it more dramatic and enticing.
No matter how you choose to tackle the blurb, though, the most important things for you to remember are:
- Be concise and keep it short.
- Be considerate of your target reader (i.e. use language that reflects your genre, style and the content of your book).
- Use hyperboles (exaggeration such as ‘never before’ and ‘mind-blowing’ and ‘heart-stopping’ are great for piquing a reader’s interest).
- Don’t give away too much (keep your ending to yourself – that’s why they need to read your book!)
- Be true to your voice (write your blurb in the same voice you wrote your book).
If you get stuck, check out a few books from your genre. Consider how they’ve constructed their blurbs and what about them works.
If you’ve written your blurb and don’t know whether it’ll sell your book, ask objective friends, associates or beta readers to have a read and see if it makes them want to find out more. If it doesn’t, then ask them why not and review.

4. Hire a proofreader
In keeping with a professional appearance, your content should be as refined as possible before you publish. That means no typos and no grammatical, punctuation or spelling errors should make it to your final copy.
The most effective and efficient way to ensure your content is top-quality is to hire a proofreader.
While you may believe you have this section covered, after thirty-odd re-drafts and multiple formatting sessions, it’s fair to assume you may have lost some perspective.
It’s okay. It happens to everyone.
If you find yourself swapping that comma for a semi-colon back and forth so many times you’ve lost count, it’s probably a good idea to step back and let someone else have a go.
This is where a proofreader comes in. Not only is it a fresh, outside eye, but it’s a trained, professional eye. An eye that is skilled and experienced in picking up extra commas, wonky indents and misspelled words. An eye that will know exactly what to do with that comma/semi-colon situation.
There are numerous professional services you can source online. There are companies that employ proofreaders, or there are freelancers available for contracts.
As with most things on the internet, there’s enough options out there to make you dizzy. And the quality is not always on par with quantity.

When looking for a proofreader, you will have the option of websites such as Upwork or Fiverr, through which you can scroll down page after page of editors and proofreaders until you find one you like. They’re cheap (from $5 for 1000 words), and promise lightning-quick turnarounds, but may not always deliver to the standard you need.
Alternatively, there are stand-alone companies you can access online, such as Scribendi or the Australia-based Manuscript Appraisal Agency, who offer an assortment of editing services including proofreading (as do the majority of other appraisal and assessment services).
As a great deal of these websites are international, spelling errors and ‘lost in translation’ moments are possible. If you choose this path, it might serve you well to find a platform and/or contractor based in your own country, or a native speaker of your language, to ensure there are no problems.
Prices for a proofreader can range, and are dependent on word count and time frame. A rush job can quadruple the price of your proofreading to shave 24 hours off the deadline. You need to consider how fast you really need your proofreading, and if you are worried about price, then plan in advance and give your proofer plenty of time.
But if the plethora of online options is giving you a headache, don’t despair. Refer to your fellow authors for guidance.
Writers’ centres and author associations in your state or country will usually offer advice, if not the services themselves.
In Australia, the Australian Writer’s Marketplace offers subscribers a database of skilled professionals and services, along with prices and locations, to help you get your book to as high a standard as possible before the final print.

5. Include front and back matter
Front and back matter is the industry term for the pages that come before and after your main content. These include:
- Imprint page (publication information), sometimes referred to as the copyright page.
- At the top of the page place the © symbol adjacent to your name and the year (i.e. © Maggie Doonan 2017). You also need to include your ISBN (which can be purchased through your publishing platform or directly here), and any professional services employed in the production of the book (such as your designers and editor). You can include the publisher’s name, address and website.
- Finally, you need to include some legal copy, like the words The Book Designer shares on his blog for public use: All rights reserved. This book or any portion thereof may not be reproduced or used in any manner whatsoever without the express written permission of the publisher except for the use of brief quotations in a book review.
- Title page.
- Praise for the book.
- Quotations garnered from other authors, reviewers, or readers. Quotes that make favourable comparisons and support your blurb are great for building credibility and reader enthusiasm.
- Table of contents (if applicable).
- Dedications.
- These should be short and sweet. A few words is all you need, such as To John, you always believed or For Mum, I love you.
- Introduction, preface and/or foreword.
- Maps and narrative information (if applicable – family trees or character lists in the instance of an expansive cast).
- Author bio.
- Include a photo if you can, and make it of professional quality. This will be the image all your readers will know you from, including industry peers.
- Index, glossary and bibliography (if applicable).
- Acknowledgements.
- A letter, of sorts, thanking any departments, companies, foundations and individuals that assisted you during the production of this book.
- Other work information, such as sample excerpts from upcoming releases.
- Email newsletter sign-up and/or website.

Now, as an independent self-publisher, you are by no means required to include every element of front and back matter, but there is a minimum you should include to ensure a professional product.
The items that you should consider mandatory are the imprint page, title page, dedications, author biography and acknowledgements. These should be organised with imprint page, title page and dedications making up the front matter, while author biography and acknowledgements make up the back matter.
When formatting, it’s beneficial to keep examples from your genre on hand for reference. How you want to lay out your front and back matter might be completely different to the industry standard.
Do the publishers in romance favour two blank pages or one between the title page and the beginning of the first chapter? Do all fantasy novels feature a map in the front, and does it come before or after the dedications?
Does every author bio feature a portrait of the author? What do most authors talk about in their bio?
If in doubt, mimic your competitors. Well-orchestrated front and back matter is essential in ensuring you present a professional book to the marketplace.
***
In this boon of self-publishing, authors are empowered. Writers are no longer living and dying by the word of a few publishing houses. But at the same time, countless authors are being crushed by this stampede to success, their unprofessional, unrefined and ultimately unappealing products crumpled underfoot.
In order to make the most of self-publishing, you must be accountable for your work. Create something that can confidently compete with commercial products.
Stand out for all the right reasons.
2 responses to “5 Ways to Make Your Self-Published Book Look Professional”
Great, comprehensive post! I learned earlier that an indie book should look no different than a tranditionally published book. I always use professional cover and interior designers. That’s the best way to stand out!
Hi James,
Glad to hear you enjoyed Maggie’s post! We absolutely agree that a great indie book is indistinguishable from a traditionally published one. Cover and interior design definitely go a long way towards achieving that 🙂
All the best with your writing and publishing!
-Claire