Explaining Amazon KDP (Kindle Direct Publishing) For Beginner Authors
June 13, 2018

If you’re considering becoming an indie author, there’s no doubt that you’ll need to become familiar with Amazon KDP (Kindle Direct Publishing).
This article is all about learning the basics of KDP, one of the biggest indie publishing platforms in the world.
We’ll take you through what it is, the basics of its dashboard, and the main elements you need to master before publishing your book.
So let’s dive right in!
Note: At this point, we should clarify that this post is in no way affiliated with Amazon KDP.
Put simply, Amazon KDP or Amazon Kindle Direct Publishing is a publishing platform for books.
It allows authors to upload and publish their book files within minutes, and make them available to the millions of Amazon visitors worldwide.
Authors like Mark Dawson, Hugh Howey and Joanna Penn, as well as myself, have all utilised this publishing platform to get our books into the hands of new readers.
Using Amazon KDP is free, with the platform taking a small percentage of your book sales royalties as its fee.
There are no upfront costs to publish with KDP; you simply sign up, enter your title’s information and upload your book files.

So why would an author choose KDP?
For me, it was a no-brainer. KDP is owned by (and publishes its titles to) the biggest e-retailer of books in the world.
There was no way I was going to miss out on that.
But there are plenty of other reasons author choose to go with KDP…
And that’s just a few of the benefits.
On a personal level, I found KDP easy to navigate and simple to publish with. The success of my first novel, Heart of Mist, is in part a testament to this platform.
So now you know what KDP is, and why authors are choosing to use it, let’s take a look at what you get access to when you sign up for an account.
Once you’ve signed in, you’ll come to what’s called your Dashboard. It’ll look something like this…
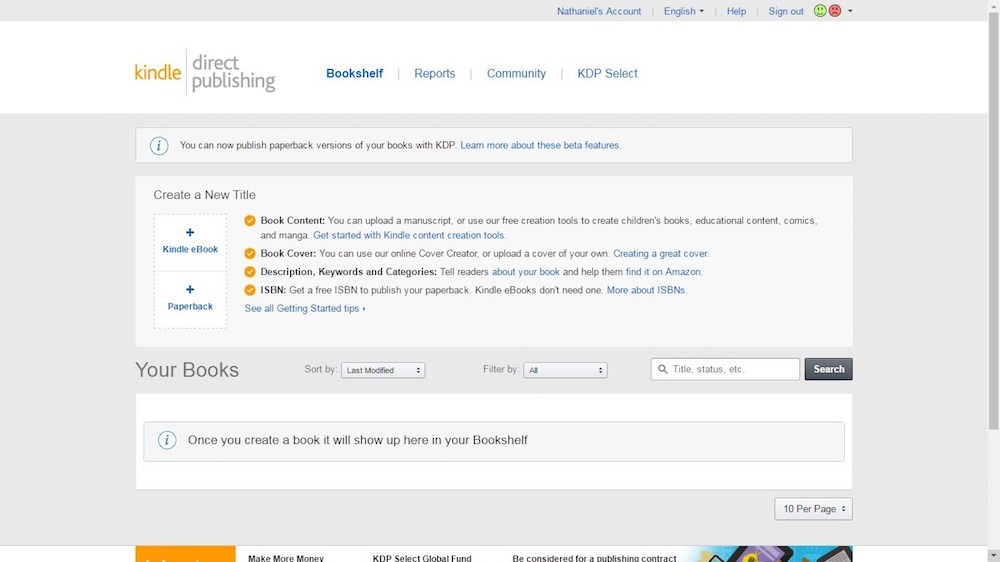
Here, you’ll find four main items in the menu as follows:
This is where you can create a new title and view your existing titles (both draft and published).
Essentially, it’s an overview of your books available on Amazon or drafted on KDP.
This part of your Dashboard is where all your sales data is held. It’s where you can generate reports, view your previous month’s royalties and generally just keep track of how your books are doing.
This is where you can access the KDP forums. Here, people have published numerous pieces of advice and discussion surrounding all aspects of publishing on KDP.
It’s an invaluable source of information, and is the best place to start should you have a specific question about the nature of the platform, or self-publishing.
This is where you can enrol your title in KDP Select, which is a special program for authors who want their books to be exclusively available on Amazon.
You can find out more information about it here.

The main sections of the dashboard you’ll need to be really familiar with are the first two: Bookshelf and Reports.
So let’s look at these a little more closely.
When you sign in, this is the screen you’ll see. It’s where you can create new titles, or manage your existing books.
This is pretty self-explanatory, but just in case: here’s where you create new books.
You can choose to create and publish a Kindle ebook or a paperback.
Within KDP, the paperback option is relatively new, with many authors still currently opting to use Amazon’s print-on-demand company, Createspace, for physical copies.
In any case, once you click ‘Create a new title’, you’re taken to a new page where you need to add your book’s details.
It looks like this…
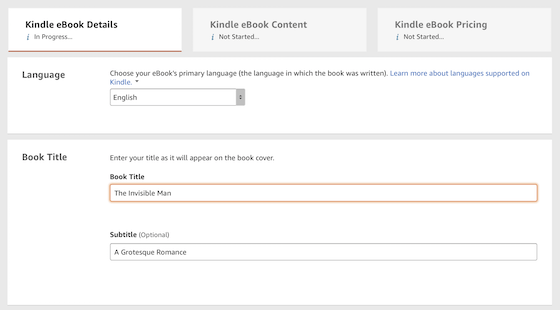
You then go through each aspect of publishing: adding the language, title, categories and keywords, as well as uploading the book file and cover and adding the pricing information.
We won’t go through this in today’s post. This is just a general overview of the KDP platform.
A step-by-step guide on how to publish through KDP can be found in our Crash Course in Self-Publishing.
Below the ‘Create a new title’ section is where your previously published or drafted books will be listed.
Essentially, it offers an overview of all your published and draft projects.
Here, you can change details and prices, upload corrected files, run KDP promotions and more.
Once you’ve published a title, this is the section of KDP that you’ll frequent the most.
It’ll look something like this…
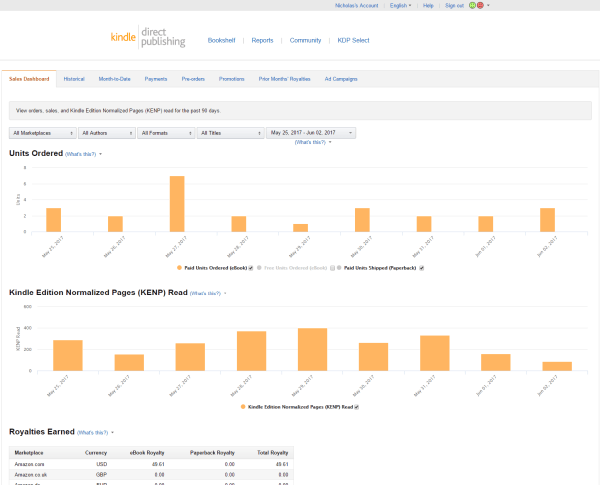
As you can see, there are tabs for:
This is where you can keep track of your sales data in (almost) real time. You can see how many books you’ve sold each day, how your sales look over time and when your royalty payments are due.
It’s worth noting that if you were a traditionally published author, you wouldn’t have access to in-depth sales data like this.
This is one of the many benefits of using this platform, and of being an independently published author.

As a indie beginner, you’ll come to find that the best way to learn and navigate these platforms is to do so practically.
Sign up for a free account and explore the different aspects of the platform in your own time, with your own projects in mind.
Either way, Amazon KDP has changed the lives of many authors, myself included, and is something I very much recommend indie authors consider taking advantage of.
For those of you wanting a more in-depth, step-by-step guide to publishing through Amazon KDP and Createspace, be sure to check out our Crash Course in Self-Publishing.
It’s a comprehensive, 34-lesson course focused on giving you the skills, confidence and resources to self-publish your books on Amazon with no technical assistance.
***
Got questions about Amazon KDP? Leave them in the comments below, and we’ll do our best to answer everyone!
Comments are closed.
2 Comments
Lynne
Non US residents need to apply to the Internal Revenue Service for a Individual Taxpayer Identification Number for Amazon’s tax requirements.
To apply, download the W7 form (Application for IRS Individual Taxpayer Identification Number), and obtain from your nation’s PassPort office a Certified Copy of your passport. A copy of you driver’s licence only confirms your identity – the IRS want proof of your citizenship. Hard copy must be mailed to the required address – applying via email or telephone is no longer accepted. It may take up to eight weeks before you recewive a response.
Once you have your IRS ITIN, complete your Amazon KDP Profile tax information. You will also need you home nations tax id code – especially if there is a tax treaty between the US and your country.
Hope this helps.
Ian Su
Wow, this was interesting! I myself have published a book via KDP.